- Getting started with Microsoft Windows Server Update Services 3.0, Part 1: Introduction
- Getting started with Microsoft Windows Server Update Services 3.0, Part 2: Requirement
- Getting started with Microsoft Windows Server Update Services 3.0, Part 3: Installation
- Getting started with Microsoft Windows Server Update Services 3.0, Part 4: Configuration
- Getting started with Microsoft Windows Server Update Services 3.0, Part 5: Configure Client
- Getting started with Microsoft Windows Server Update Services 3.0, Part 6: Disconnected network (1)
- Getting started with Microsoft Windows Server Update Services 3.0, Part 7: Disconnected network (2)
After 4 parts have passed, you have finished basic configuration on WSUS server. Next, you need to configure client computers to contact the WSUS server to get some updates. The best way is to configure from the domain group policy so that you only configure once. Then, the policy will be apply to all clients in the domain but this approach requires you to have an active directory in domain. In this post, I’ll show how to configure clients using group policy to get updates from the WSUS server.
Note: You can also configure clients that in a non-active directory, too. But I won’t cover in this article.
Sections
Step-by-step to configure client
Configure new group policy
- On the Active Directory server, open Active Directory Users and Computers.

- Create a new OU (Organization Unit) called ‘TestOU’. In next following steps, I’ll create a new policy for this OU and assign clients to the OU.

- Right click on ‘TestOU’, select Properties. On TestOU Properties, select Group Policy tab. Then, create a new group policy object links by click on New and named as ‘WSUS’.

- Edit this ‘WSUS’ policy by click Edit.

- On Group Policy Object Editor, expand Computer Configuration -> Administrative Templates -> Windows Components -> Windows Update. You’ll see on the right side are policy that you can configure for Windows Update.
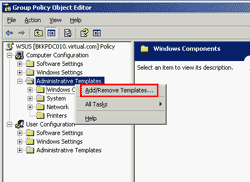
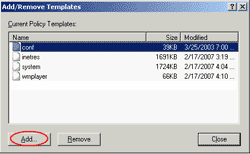
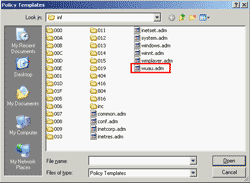
Note: If you don’t see Windows Update, you may need to load WSUS Administrative template first. See the next section at the bottom of this post for detail steps.

- I’ll configure only some of policies for Windows Update. First, I’ll configure how automatic updates works. Double-click “Configure Automatic Updates”.
The Configure Automatic Updates Properties appears, select enabled and leave other settings as default. You can see more details of this policy by click on Explain tab. Click OK.

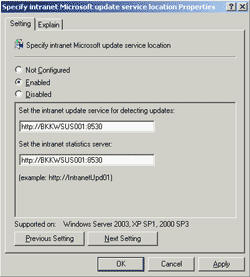
- Next, enable “Specify intranet Microsoft update services location”. You have to specify a WSUS server which the automatic update will contact for updates. In this example, I have already configured WSUS server on BKKWSUS001 and I have customized port so I need to type “http://BKKWSUS001:8530”. Click OK.
Note: You need to specify port if you have customized WSUS on the installation.
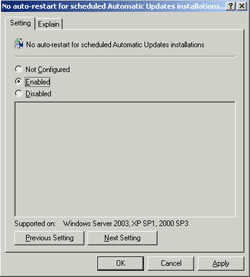
- Next policy that I’ll enable is “No auto-restart for scheduled Automatic Updates installations”. This policy prevents auto restart when the updates has been installed. Instead, it’ll ask the current logon user whether to restart or not. Next, close the Group Policy Object Editor and TestOU Properties. Click OK.
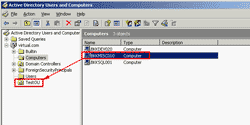
- Back to Active Directory Users and Computers, move a computer to ‘TestOU’ as client of WSUS. In this example, I drag BKKMISC010 from Computers to ‘TestOU’ to be as a client computer.
- There is a warning pop-up message about moving a computer will affect policy on the object that you’re moving. Click Yes to continue.

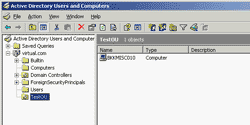
- Now I have a client computer ‘BKKMISC010’ on ‘TestOU’ which has configured policy to get updates from WSUS server.
- Back to WSUS server, open Microsoft Windows Server Update Services 3.0 SP1 by select Start -> Programs -> Administrative Tools -> Microsoft Windows Server Update Services 3.0 SP1.
Expand Computers -> All computers. You’ll notice that still no computer connect to this WSUS server. What’s wrong? The answer is that a group policy that you’ve configured a few minutes ago hasn’t apply to the client computer yet.
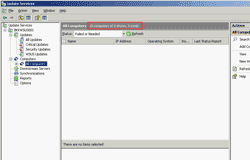
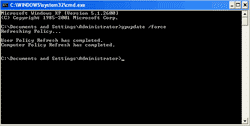
- You can force the client computer to update the policy immediately by execute “gpupdate /force” on the client computer. In this example, I open command prompt and type the command “gpupdate /force” on BKKMISC010.
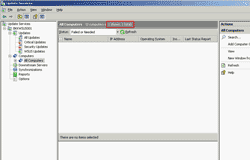
- Back to WSUS server, click refresh. Now you’ll see there is a new computer but you can’t see any detail.
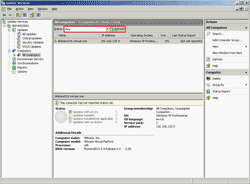
- To view that computer, change filter status to any and click refresh again. Now you’ll see the detail of the client computer.
- That’s it. You have finished setup both on WSUS server and client. On the next part, I’ll talk about setting up a WSUS on a disconnected network (No Internet connection).
EXCELENT POST!!!
If you didn’t show hot to setup GPO, I would never get the part where I have to move computer accounts into OU where GPO is linked. Now all my policies are applying.
Thank you so much!!!
great post
thank you for showing the steps!
I too know Damien from Derry in Ireland and i am really shocked to hear this and it is difficult to believe. I hope the truth comes out.
Thank you a lot for sharing this with all people you actually understand what you are talking about! Bookmarked. Please also talk over with my website =). We can have a hyperlink change contract among us