- Getting started with Microsoft Cluster Service, Part 1: Introduction
- Getting started with Microsoft Cluster Service, Part 2: Configure iSCSI disk
- Getting started with Microsoft Cluster Service, Part 3: Create Server Cluster
- Getting started with Microsoft Cluster Service, Part 4: Add Node to Server Cluster
- Getting started with Microsoft Cluster Service, Part 5: Create File Server Cluster (1)
- Getting started with Microsoft Cluster Service, Part 6: Create File Server Cluster (2)
- Getting started with Microsoft Cluster Service, Part 7: Create MSSQL server cluster (1)
- Getting started with Microsoft Cluster Service, Part 8: Create MSSQL server cluster (2)
From previous part, I have a server cluster ‘BKKCluster.virtual.com’ with a node on BKKSQL010. With a node, I can’t use failover feature of the cluster (Failover means switching applications and services from one node to another node). Therefore, I need to add another node to this cluster server to enable failover feature. In this part, I’ll show how to add node (BKSQL020) to the cluster server.
After the server cluster has been created and another node has been added, I’ll configure the traffic on the network by seperate the communications (client access and internal communication between servers) to different network interface since I have 2 network interfaces on each server already (on part 1).
Sections
Step-by-step to add node to server cluster
Create a server cluster
- On BKKSQL020, open Cluster Administrator by Start -> Programs -> Administrative Tools -> Cluster Administrator.
- On Open Connection to Cluster in Cluster Administrator window, select Add nodes to cluster on Action and type the server cluster name ‘BKKCluster’.

- Add Nodes Wizard window appears, click next.

- On Select Computers page, type server name that you want to add to this server cluster and click Add. The server name will be added to the selected computers box. Click next.

- On Analyzing Configuration, the wizard will determine whether the server can be configured as a node of the server cluster. If there isn’t any errors or warning messages, click next to continue.

- On Cluster Service Account, type the password of the user account that used to start this cluster service. The user account is created on the part3. Click next.

- On Proposed Cluster Configuration, you can review the configurations. Click next.

- On Adding Nodes to the Cluster, waiting for the wizard add this node (BKKSQL020) to the server cluster.
Note: If you found the warning message “0x00138f: The cluster resource could not be found” on this step and you’re confidently that you’ve configured the shared disk correctly on the node, don’t worry you can continue to the next step without fixing any problem. The cause of this problem is occur by the wizard can’t verify that all the cluster nodes have access to the same disks. For more information, visit You receive a “0x00138f Cluster resource not found” error message when you try to join a second node to a Windows Server 2003 cluster
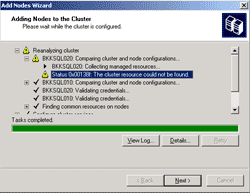
- In some environment, the wizard can verify the shared disk so you won’t find any errors or warning messages. Click next to continue.
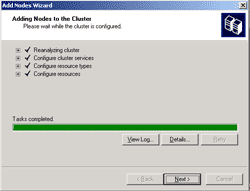
- Click Finish to complete adding nodes wizard.

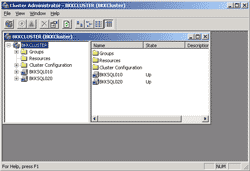
- On Cluster Administration, you’ll now see 2 nodes on the server cluster.
Configure network communication for server cluster
- On Cluster Administrator, expand BKKCluster -> Cluster Configuration -> Network. You’ll see 2 network interfaces.
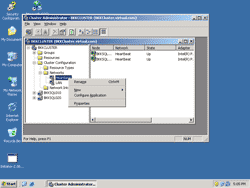
- To configure network interface for internal communication, right click on the network interface -> Properties. On new window, select Internal cluster communications only. Click OK.
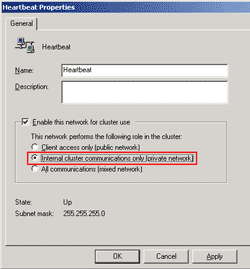
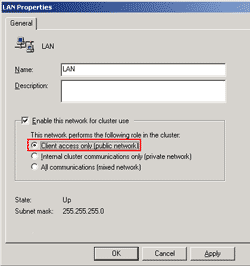
- To configure network interface for client access, right click on the network interface -> Properties. On new window, select Client access only. Click OK.
