- Getting started with Microsoft Cluster Service, Part 1: Introduction
- Getting started with Microsoft Cluster Service, Part 2: Configure iSCSI disk
- Getting started with Microsoft Cluster Service, Part 3: Create Server Cluster
- Getting started with Microsoft Cluster Service, Part 4: Add Node to Server Cluster
- Getting started with Microsoft Cluster Service, Part 5: Create File Server Cluster (1)
- Getting started with Microsoft Cluster Service, Part 6: Create File Server Cluster (2)
- Getting started with Microsoft Cluster Service, Part 7: Create MSSQL server cluster (1)
- Getting started with Microsoft Cluster Service, Part 8: Create MSSQL server cluster (2)
In this part and next following post, I’m going to create a file server cluster that has 2 nodes which are BKKSQL010 and BKKSQL020. This part, I’ll create a group to hold all resouces for the file server cluster. Then, I’ll create a physical disk resource (Disk R:) on the server cluster to keep my shared files. Next, I’ll create a virtual IP address for client to access the shared folder. Last step in this part, I’ll create a network name resource to the IP address so I can access the shared folder through this name besides the IP address. I’ll cover how to create a file share resource on the next post.
Sections
- Create a new group and physical disk resource
- Create a new IP address resource
- Create a new network name resource
Step-by-step to create file server cluster
Create a new group and physical disk resource
- Open Cluster Administrator and connect to the existing server cluster (BKKCluster).
- Create a new group for this file cluster by right click on Group -> New -> Group.

- On New Group window, type the name of this group. In this example, I’ll create a group called ‘FileCluster’. Click next.

- On Preferred Owners, select the nodes that you want to add to this group. Also, you can re-order nodes by using Move Up or Move Down button. I’ll add both nodes to be the owner of this group and let BKKSQL010 is at the top. Click finish.

- Now you have a new group called ‘FileCluster’. Next is to add a physical disk in this group by create a new resource. Right click on the ‘FileCluster’ group -> New -> Resource.

- On New Resource window, select Resource type as a ‘Physical Disk’ and Group as ‘FileCluster’. Set name of this resource to ‘Disk R:’. Click next.

- On Possible Owners, assign nodes as same as when you created a new group. Click next.

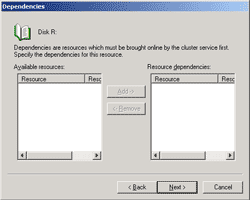
- On Dependencies, you can add resources which need to be brought online before this resource. Since this is the first resource I’m creating so it hasn’t any resource depends on. Just click next.
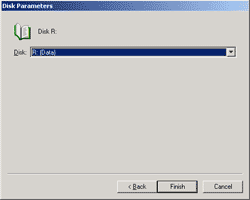
- On Disk Parameters, select the disk R:. Click finish.
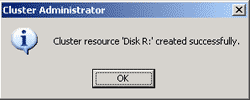
- Now the first resource has been created.
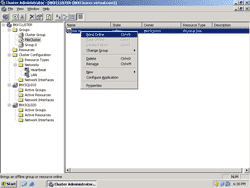
- Bring the resource online by right click on the resource ‘Disk R:’ and click Bring Online.
- Open R: drive on BKKSQL010. This drive will be able to fail-over now. Next, create a new folder ‘Files’. This will be a file sharing folder.

Create a new IP address resource
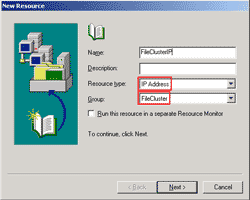
- Create a IP Address resource for access this file sharing resource by using IP Address. Select Resource type to ‘IP Address’ and Group as ‘FileCluster’. Set name of this resource to ‘FileClusterIP’. Click next.
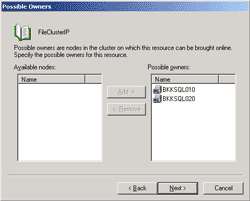
- On Possible Owners, assign nodes as same as when you created the first resource. Click next.
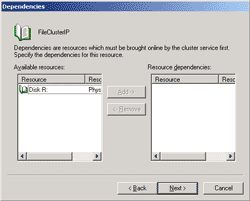
- On Dependencies, no need to add any resource. Click next.
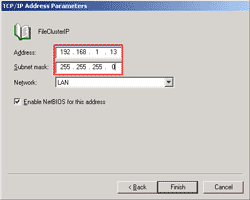
- On TCP/IP Address Parameters, set IP Address for this resource. I’ll set IP Address to 192.168.1.13/24 and select Network LAN. Click finish.
- The resource IP Address has been created.

- Now you can access this server cluster by using the IP Address that you’ve just created.
Create a new network name resource
- Next, I’ll create a resource ‘Network Name’ for the IP Address that just created. Right click on the ‘FileCluster’ group -> New -> Resource.
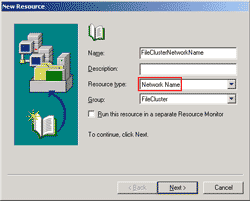
- Select Resource type to ‘Network Name’ and Group as ‘FileCluster’. Set name of this resource to ‘FileClusterNetworkName’. Click next.
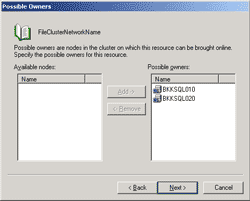
- On Possible Owners, assign nodes as same as when you created the previous resource. Click next.
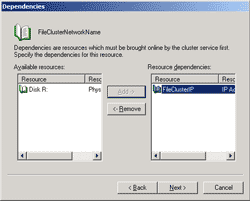
- On Dependencies, add resource ‘FileClusterIP’ to the resource dependencies. Click next.
- On Network Name Parameters, set the Name that you want. This is the name for accessing by client. Select the check box ‘DNS Registration Must Succeed’ to register this name to DNS Server before bring this resource online. Click finish.
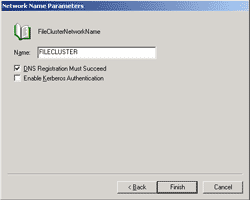
- The resource Network Name has been created.
