- Getting started with Microsoft Cluster Service, Part 1: Introduction
- Getting started with Microsoft Cluster Service, Part 2: Configure iSCSI disk
- Getting started with Microsoft Cluster Service, Part 3: Create Server Cluster
- Getting started with Microsoft Cluster Service, Part 4: Add Node to Server Cluster
- Getting started with Microsoft Cluster Service, Part 5: Create File Server Cluster (1)
- Getting started with Microsoft Cluster Service, Part 6: Create File Server Cluster (2)
- Getting started with Microsoft Cluster Service, Part 7: Create MSSQL server cluster (1)
- Getting started with Microsoft Cluster Service, Part 8: Create MSSQL server cluster (2)
This post continue from last post “Getting started with Microsoft Cluster Service, Part V: Create a file server cluster (1)”. I decide to separate this part since it’s quite long to be keep in a post. In this post, I’ll create File Share resource which depends on all of the resources that I’ve created in the prevoius post. Then, I’ll bring all the resources online to complete create a file server cluster. After that, I’ll try to failover the file server cluster service from one node to another node.
Sections
Step-by-step to create file server cluster
1. Create a new file share resource
- Continue from previous post on Cluster Administrator window. Create a new resource ‘File Share’.
Right click on the ‘FileCluster’ group -> New -> Resource. Set name to ‘TestFileShare’ . Select resource type as ‘File Share’ and group as ‘FileCluster’. Click next.

- On Possible Owners, assign both nodes as same as when you created the previous resource. Click next.

- On Dependencies, add physical disk, IP Address and network name resources. This file share resource need these resources to be online first. Click next.

- On File Share Parameters, enter share name as ‘Share’ and path to ‘R:\Files’ which is the share folder that I’ve created before. The share name will be the name that I’ll use to access later “\\BKKCluster\Share”. Click permission to edit this share permission.

- On Permission for share, set the permissions. This is an example so I try to set ‘Full control’ for everyone. Click OK. Back to File Share Parameters window, click finish.

- The resource File Share has been created.

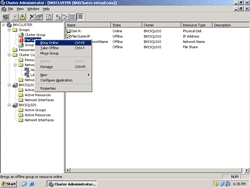
- Next, bring online this file server cluster by right click on ‘FileCluster’ group -> Bring Online. All of the resources in this group will be bring online.
2. Test failover the file server cluster service
- After I’ve brought online the file server cluster group, you’ll see all the resources are online now.

- Next, try to access the share folder by open windows explorer to “\\BKKCluster\Share”. This is the share folder on the cluster server.
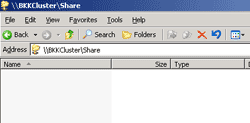
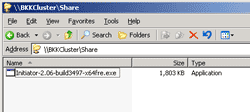
- Try to test that the file server cluster can be failover, put a file to the share folder. Next, I’ll try to stop the node that running file cluster service and try to browse to the file if I can access to the service.
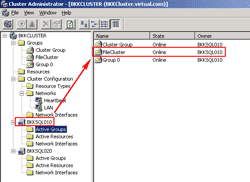
- Back to Cluster Administrator, find out that ‘FileCluster’ group is on which node by click on Active Groups of each node. Since I’ve configued ‘BKKSQL010’ as preferred owner, the file server cluster is running on ‘BKKSQL010’.
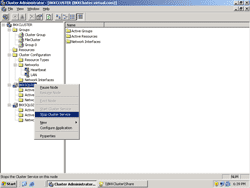
- Stop this node to see if the file server cluster can be failover to BKKSQL020 by right click on ‘BKKSQL010’ node -> select Stop Cluster Service.
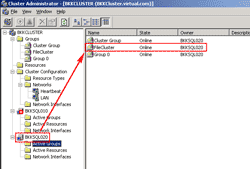
- Wait for moment, select Active groups on BKKSQL020. You’ll see the ‘FileCluster’ group has been failover to this node. Also, open share folder “\\BKKCluster\Share”, you’ll see that the file is still there. That’s means the file server cluster service is running properly even if one node has been stopped.
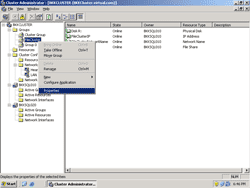
- If you start cluster service on BKKSQL010 again, the resource will not failback to the node by default. To enable failback on ‘FileCluster’ group, right click on the ‘FileCluster’ group -> select Properties.
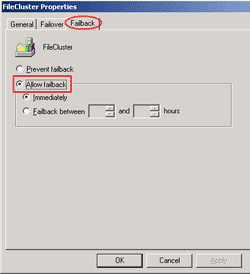
- On FileCluster Properties, select Failback tab and select Allow failback. Choose Immediately. Click OK.
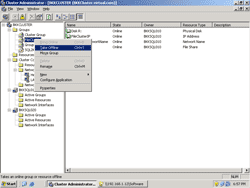
- You can disable the group by right click on ‘FileCluster’ group -> select Take Offline.
THe posts about clustering are really good : clear , not complex , step-by-step …, i followed the instructions and now i have a 2 nodes cluster on my vmware to do my tests…
Im really impatient to follow the last part ‘how to create à mssql server cluster (2)’
good job Nipawit !
Hi, Benoit
Thanks for the compliment. The last part will be released on the end of this week.
Cool guide, Very clear!
Maybe you could add a Physical disk resource to the guide?
Physical disk resource was added on this post: Getting started with Microsoft Cluster Service, Part V: Create a file server cluster (1).
Hey there !!!!!!
Thanks Dude !!!!!!!
you posted artical regarding creating file server cluster is really helpfull
Thanks once againg and keep it up
Abi
Very good, I love you. You make me happy.
Thanks for these.
THANK YOU!!! Clear, easy to follow, step by step instructions on how to accomplish this. I didn’t have to purchase another door stop of a book from Microsoft that would have taken a thousand pages to explain what you have here ever so much clearer (with no asprin required!). Thanks again.
Simple superb … It’s look very nice easy to follow 🙂 thanks mate!
Great information. Thanks a lot!
Hello, great tutorial, thanks.
However, I did some testing and found some problems.
1 – When we turn off normally one node, the features are usually transferred to another node.
2 – When we turn off the computer power to simulate a power failure, the node is not automatically transferred to another server, and if i can do it to return work normally, I have to restart the Openfiler server storage.
Any tips?
Thanks.
Sorry for bad English …