- Getting started with Microsoft Windows Server Update Services 3.0, Part 1: Introduction
- Getting started with Microsoft Windows Server Update Services 3.0, Part 2: Requirement
- Getting started with Microsoft Windows Server Update Services 3.0, Part 3: Installation
- Getting started with Microsoft Windows Server Update Services 3.0, Part 4: Configuration
- Getting started with Microsoft Windows Server Update Services 3.0, Part 5: Configure Client
- Getting started with Microsoft Windows Server Update Services 3.0, Part 6: Disconnected network (1)
- Getting started with Microsoft Windows Server Update Services 3.0, Part 7: Disconnected network (2)
When you have installed WSUS 3.0 SP1, the configuration wizard appears to let you configure WSUS for the first time. You can configure to synchronize updates from Microsoft Update directly or other WSUS server, specify proxy server for WSUS, determine which products you want to synchronize, determine which classification (critical updates, tools, drivers, service pack, etc.) of updates you want.
Next, I’ll configure WSUS to get updates directly from Microsoft Update and select only service pack for Windows XP as an example.
Note: For a disconnected WSUS server that doesn’t need to synchronize with any server, you simply cancel this wizard window if it shows up after the installation.
Step-by-step for WSUS configuration
- On the first page of WSUS configuration wizard, click next.

- On Join the Microsoft Update Improvement Program, you’ll decide whether to give some information to Microsoft. I choose not and click next.

- On Choose Upstream Server, select Synchronize from Microsoft Update. If you want to synchronize to other WSUS server, select the latter option and specify the server name and port. Click next.

- On Specify Proxy Server, if you use proxy to access the Internet, you need to enter the information here. Otherwise, click next.

- On Connect to Upstream Server, click Start Connecting and the wizard will try to check that it can connect to the upstream server properly.

- If nothing errors, you’ll able to click next to continue.

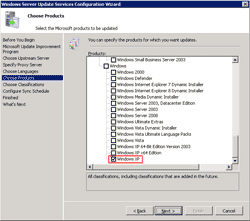
- On Choose Products, uncheck all the products and check only Windows XP since I want on updates for Windows XP only in this example. Click next.
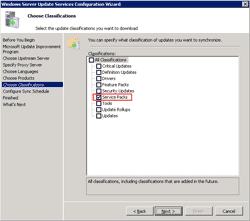
- On Choose Classifications, check only Service Packs. Click next.
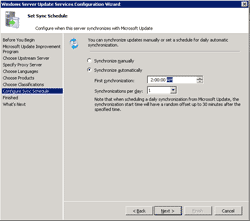
- On Set Sync Schedule, you can configure when the WSUS will synchronize with the upstream server that you’ve just specify. For efficiency, it should synchronize when the network is idle. I configure to synchonize automatically everyday at 2.00 AM. Click next.
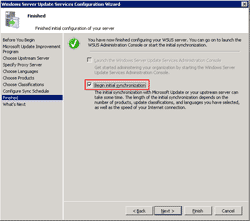
- On Finished, you can choose to synchronize with the upstream server now by check the Begin initial synchronization box. Click next.
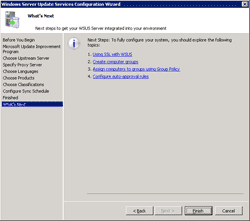
- On What’s Next, it tells you what you should do next. Click finish to complete initial configuration.
Thank’s for your comment.
Hi,
how to give full access to wsus server 3.0 sp1 to synchronise with microsoft update server.
I m getting the error message†“The synchronization with the upstream server or Microsoft Update was
canceled.†while doing wsus configuration wizard on start connecting
i had addded the default microsoft update i;e domain set, url set in isa 2006 access rule.
hi,
I m using isa 2006 as a proxy server. i m not able to install the wsus configuration wizard, when i configure proxy setting and hitting on start connect
The following error message show:
WebException: The remote server returned an error: (407) Proxy Authentication Required.
at System.Net.HttpWebRequest.GetRequestStream()
at System.Web.Services.Protocols.SoapHttpClientProtocol.Invoke(String methodName, Object[] parameters)
at Microsoft.UpdateServices.ServerSyncWebServices.ServerSync.ServerSyncProxy.GetAuthConfig()
at Microsoft.UpdateServices.ServerSync.ServerSyncLib.InternetGetServerAuthConfig(ServerSyncProxy proxy, WebServiceCommunicationHelper webServiceHelper)
at Microsoft.UpdateServices.ServerSync.ServerSyncLib.Authenticate(AuthorizationManager authorizationManager, Boolean checkExpiration, ServerSyncProxy proxy, Cookie cookie, WebServiceCommunicationHelper webServiceHelper)
at Microsoft.UpdateServices.ServerSync.CatalogSyncAgentCore.SyncConfigUpdatesFromUSS()
at Microsoft.UpdateServices.ServerSync.CatalogSyncAgentCore.ExecuteSyncProtocol(Boolean allowRedirect)