On this article, you will see how to install Windows 7 from an USB Flash Drive. The benefit of using USB Flash Drive to install Windows 7 are:
- Faster than using DVD. It takes less time to install Windows 7.
- An USB Flash Drive is smaller than DVD. Hence, easier to carry and maintain.
- Can be installed on computer or laptop that doesn’t has DVD-ROM but has an USB port.
To install Windows 7 from an USB Flash Drive, you need a Windows 7 installation DVD or image file (.iso). Next, make a bootable USB Flash Drive by using the Windows 7 image file and UNetbootin, which is a free software that allows you to create bootable Live USB drives. Then, you will get a bootable USB Flash Drive which you can use to install Windows 7.
Requirement
- Microsoft Windows 7 installation DVD disc or image file (.iso)
- UNetbootin
- An USB Flash Drive.
- The computer or laptop which will be installed Windows 7 must support boot from USB storage device. Most computer and laptop in these days support this feature already.
Note: This article demonstrates only for Windows 7 but you can apply to other operating system, such as Windows XP, Windows Vista, Linux, etc.
Step-by-step to install Windows 7 from USB flash drive
- Prepare an image file. You can use free software, such as ImgBurn, to create an ISO image file from Windows 7 installation DVD. You can skip this step if you already have Windows as an image file (.iso).
- Insert Windows 7 installation DVD in your DVD-ROM Drive.
- Run ImgBurn and click Create image file from disc.
- Select destination for image file by click on File -> Browse for a destination file and click Save.
- Start create image file by click File -> Read or click on the Read’s icon.
- Download UNetbootin from http://unetbootin.sourceforge.net. You can run it after download, no installation need.

- Insert your USB Flash Drive and run UNetbootin.

- Select Diskimage (ISO) and browse to your Windows 7 image file. On the bottom, select drive of the USB Flash Drive as destination. On this example, the target drive is “H:\“. Click OK to start create a bootable USB Flash Drive.

- The process could takes times a little while.

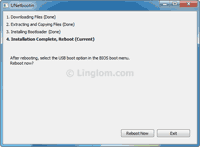
- When the process finishes, you have an option to reboot your system or exit the program. Now you can use this USB Flash Drive to boot on any computer or laptop.
Note: You may need to change boot order in BIOS on a computer or laptop, which you want to boot using the USB Flash Drive, to boot from USB storage device first.


Lovely …nice and very easy explenation about instaling Win 7 from flash USB….it works….thanks!!!!!!!!!!!!!!!!!!!!!!
Thanks. It very easy method. Good luck.