Kaspersky Anti-Virus is now one of the popular anti-virus softwares. The strong point are that it can detect and clean most of virus, light weight – it consumes less system resource comparing with other anti-virus softwares and Kaspersky’s signature is updated regularly (about every 2 hours).
Today, I have to setup Kaspersky Anti-Virus for Linux Workstation on a RedHat Enterprise 4. But in my environment, I can’t update signature from the Internet directly because it’s a separated network. So I have to manually update the signature myself. And I’ll install only few servers so there’s no need to install administration console for centralize management Kaspersky’s product. Therefore, I’ll not install Kaspersky Network Agent.
This article, I’ll show how to install Kaspersky Anti-Virus 5.7 on Linux RedHat Enterprise 4 by starting from install Webmin first. Then, I’ll install Kaspersky Workstation 5.7 and update the signature manually. Finally, I’ll add cronjobs to perform a scanning every week.
Note: Webmin is a web-based interface for system administration for Unix which will be used for configure Kaspersky Workstation.
Section
- Install Webmin on Linux RedHat Enterprise 4
- Install Kaspersky Anti-Virus Workstation 5.7 on Linux RedHat Enterprise 4
- Manually Update the Kaspersky Anti-Virus’s signature
- Start the Kaspersky Anti-Virus On-Access Scanner
- Add cronjobs to run Kaspersky Scanner
Step-by-step to setup Stand-Alone Kaspersky Anti-Virus 5.7 Workstation on Linux RedHat
Install Webmin on Linux RedHat Enterprise 4
- Login as ‘root’ on Linux RedHat Enterprise 4 server. You may be logged in as other user and use ‘su’ command to execute as ‘root’.

- Insert Kaspersky’s CD on the server. I got it from Kaspersky’s vendor. Copy these .rpm files to local server.
- Webmin: webmin-1.370-1.noarch.rpm
- Kaspersky Workstation 5.7 for Linux: kav4ws-5.7-17.i386.rpm
- Kaspersky’s CDKey: CDKEY.key
- Kaspersky’s signature: av-i386-cumul.zip
Note: For webmin, you can find one at www.webmin.com. For av-i386-cumul.zip, you can find the latest signature one at kaspersky.com.

- Open Terminal by right click on any space on the desktop and select Open Terminal. Type the command below to install Webmin.
rpm -ivh /root/Desktop/webmin-1.370-1.noarch.rpm
When the installation finishes, it’ll show how to open Webmin as in the figure. In this example, it tells I can open Webmin by browse to http://localhost.localdomain.com:10000 and login using ‘root’ account.

- Test if you can access Webmin by open the browser and enter the url that you get from the last step. It’ll ask for user account for Webmin server. Enter your account user and password.

- Now you’ll see the main page of Webmin. The Webmin has been installed successfully.

Install Kaspersky Anti-Virus Workstation 5.7 on Linux RedHat Enterprise 4
- Back to Terminal. Type the command below to install Kaspersky Workstation 5.7.
rpm -ivh /root/Desktop/kav4ws-5.7-17.i386.rpm
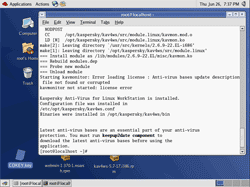
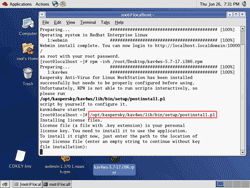
When the installation finishes, it recommends you to run postinstall.pl to configure Kaspersky Anti-Virus.

- Run postinstall.pl to configure it by type the command below.
/opt/kaspersky/kav4ws/lib/bin/setup/postinstall.pl
- The first thing that the configuration asks is the license key of Kaspersky. You can obtain this file from Kaspersky by buying the product. Type only the folder that you keep the file. In this example, I have the license key file on /root/Desktop/CDKEY.key so I type
/root/Desktop
Note: When configuration finishes, you can delete the license key file. Kaspersky has already load the license to its system.
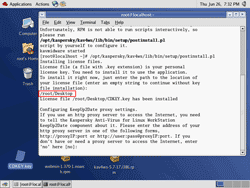
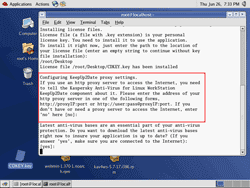
- Next, the configuration asks for the proxy to access the Internet to get updates. Since I’ll configure an offline system, I can ignore this configuration. I simply press ‘Enter’ to accept default value ([No]).
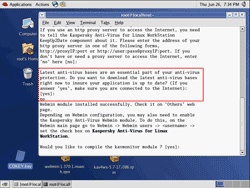
- Next, it asks to update the signature. Again, this is offline system. I’ll type ‘no’.
Note: For the first time of installation, you have to update the signature at least once. Otherwise, it can’t run. I’ll manually update the signature in the next few steps.
- Next, it asks to compile kavmonitor, simply press ‘Enter’ to proceed.
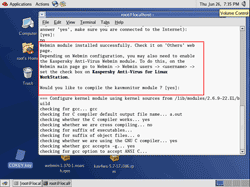
- Now the Kaspersky Anti-Virus for Linux Workstation is installed. You’ll noticed some error but it’ll be solved after update the signature.
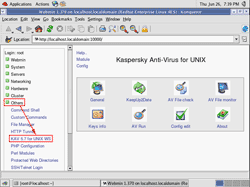
- Check if Kaspersky Anti-Virus for Linux is installed properly by open Webmin. Browse to Other -> KAV 5.7 for UNIX WS. This is the configuration page for Kaspersky Anti-Virus 5.7.
Note: If you don’t see this menu, recheck the Kaspersky’s configuration again.
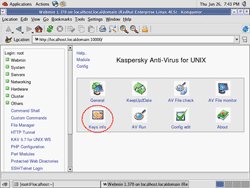
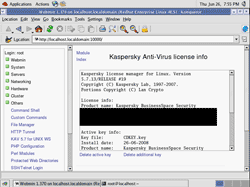
- Now Kaspersky Anti-Virus for Linux can’t be started yet since you haven’t update the signature. Click on Key Info to view license information.
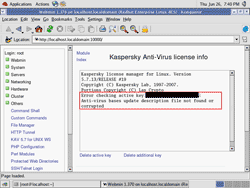
- You’ll see an error on license page. Don’t worry, this will be solved by update the signature.
Manually Update the Kaspersky Anti-Virus’s signature
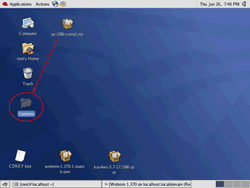
- On Desktop, extract av-i386-cumul.zip to a folder. In this example, I extract all files to /root/Desktop/Updates/.
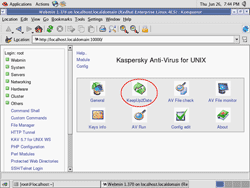
- Back to Webmin, click on KeepUp2Date in Other -> KAV 5.7 for UNIX WS.
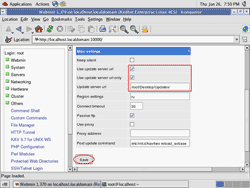
- On KeepUp2Date menu, browse to misc settings. Check ‘Use update server url’ and ‘Use update server url only’ and change ‘Update server url’ to the folder where you have extracted the signature files. In this example, it is ‘/root/Desktop/Updates/’. And click Save.
Note: The ‘Update server url’ path must be follow with ‘/’.
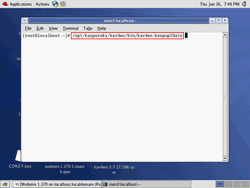
- Open Terminal and type the command below to update the signature.
/opt/kaspersky/kav4ws/bin/kav4ws-keepup2date
- Waiting until the update is finished, you’ll see some error message because Kaspersky Anti-Virus hasn’t started yet.
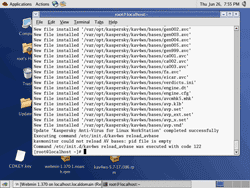
- Now the signature is up-to-date. Browse to Key Info on Webmin again, the license info has been shown correctly.
Start the Kaspersky Anti-Virus On-Access Scanner
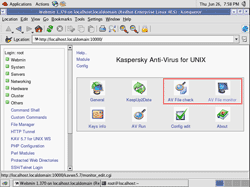
- Before start Kaspersky Anti-Virus On-Access Scanner, you can configure how to handle when Kaspersky Anti-Virus found suspicious, infected files in ‘AV File Check’ and ‘AV File Monitor’. I’ll not cover in these configuration.
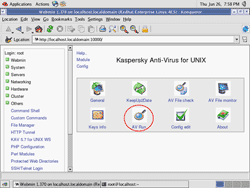
- When you have finished configuration, next I’ll start Kaspersky Anti-Virus On-Access Scanner by click on ‘AV Run’.
- Browse to the bottom of the page, click ‘Start’ button on Kaspersky Anti-Virus On-Access Scanner.
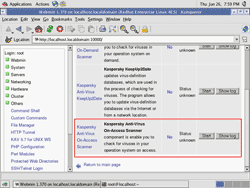
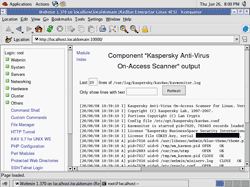
- It’ll show Kaspersky Anti-Virus On-Access Scanner Output.
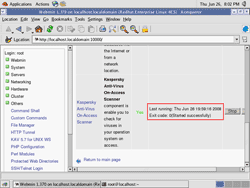
- Back to ‘AV Run’, you’ll see the service status is started with no errors (Exit code:0).
Add cronjobs to run Kaspersky Scanner
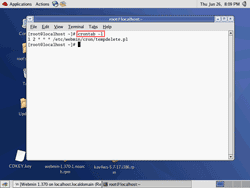
- Open Terminal, type the command below to view current cronjobs.
crontab -l
- Type the command below to edit cronjob.
crontab -e
Note: You can customize the frequency to run these jobs by change the values. For more information about cronjobs, see Crontab – Quick reference.
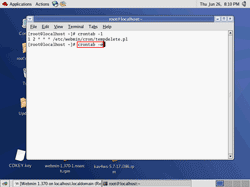
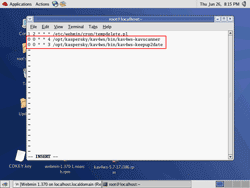
- On the cronjob’s editor, add these 2 lines and save the file.
0 0 * * 4 /opt/kaspersky/kav4ws/bin/kav4ws-kavscanner
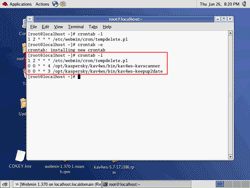
0 0 * * 3 /opt/kaspersky/kav4ws/bin/kav4ws-keepup2date - Review the cronjobs again by type the command.
crontab -l
- Now you have finished configure cronjobs.
Summary
Now I have Kaspersky Anti-Virus 5.7 Workstation on Linux RedHat. The routine that I need to do is to update the anti-virus’s signature regulary to ensure that the servers are safe from virus threats. For ease of management, you can extend by implement Kaspersky Administration console to manage Kaspersky’s product.
Thanks for the standalone licensing.
I was wondering if it is possible to get license for Kasperksy Linux file server(Fedora 9) from the Windows Administration Kit(On windows server 2003) which has got more than enough licenses.
Is this possible ? Please help me
Hi, Erma
I think the license is for specific operating system. But I’m not sure about this, try to contact Kaspersky support.
Kaspersky is the best Anti-Virus program i have ever used. it is way better than Mc Affe and Norton Antivirus.
i have used Kaspersky and it is a good anti-virus, my only complain about Kaspersky is that it uses more memory compared to other anti-virus like Avast.
thank you very much its really worked..