- Working with ISO Image and MDF/MDS using Daemon Tools Lite, Part 1: Introduction
- Working with ISO Image and MDF/MDS using Daemon Tools Lite, Part 2: Install Daemon Tools Lite
- Working with ISO Image and MDF/MDS using Daemon Tools Lite, Part 3: Create ISO Image
- Working with ISO Image and MDF/MDS using Daemon Tools Lite, Part 4: Create MDF/MDS files
- Working with ISO Image and MDF/MDS using Daemon Tools Lite, Part 5: Mount Disk Image
Create MDF/MDS files
In the previous post – Part 3: Create ISO, you have seen how to create ISO image file. Now, I will show you how to create MDF/MDS files from an audio CD.
Note: The steps on this post are similar as in the previous post except on step 6, you only change the Save as type property. If you have read the previous part, you can skim through this post.
Step-by-step
- Right-click on the Daemon Tools Lite icon in the notification area (system tray) and select DAEMON Tools Panel.

- The panel appears upper the Windows task bar. Click on the Disc Imaging icon. The icon which has a small diskette over a disc.

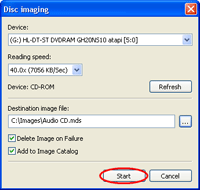
- On Disc Imaging, you can select a device or drive that you want as a source.

- Next, insert an audio CD or any disc that you want to create an image and click Refresh. In this example, you will see the Reading Speed is 40.0x (7056 KB/Sec) and Device is a CD-ROM.

- You can change the destination image file by click on the browse button.

- Select file name and folder that you want save the image file. Also, ensure that Save as type is Media descriptor files (*.mds).

- Click Start to begin create MDF/MDS files.

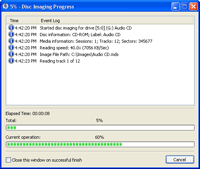
- This step may takes some time depends on the reading speed of the device and how large is the source disc.

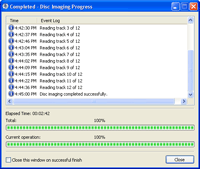
- Now Disc Imaging has finished. In this example, it takes almost 3 minutes to create MDF/MDS files from the audio CD.

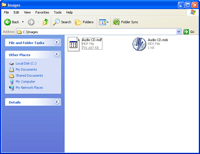
- Open to the destination folder, you will see MDF/MDS files that have been created.
