- Accessing SQL Server on ASP.NET Web Application using SqlDataSource Web Control, Part 1: SELECT Data
- Accessing SQL Server on ASP.NET Web Application using SqlDataSource Web Control, Part 2: UPDATE Data
On this post, you will see how to develop an ASP.NET web application that query data from SQL Server 2005 and display the result on a GridView object using SqlDataSource web control so you don’t have to write any code!
Step-by-step to SELECT data
- Drag a SqlDataSource object from Toolbox to a Web Form.

- On SqlDataSource1 object, click Configure Data Source.

- On Choose Your Data Connection, click New Connection.

- On Add Connection, select Data Source as Microsoft SQL Server (SqlClient). Then, type the Server name of the SQL Server and select a database. On this example, the server is BKKSQL001\INSTANCE01 and Northwind is the database.

- On Save the Connection String to the Application Configuration File, click Next to continue.

- On Configure the Select Statement, select Specify columns from table or view and select Products table. Then, check ProductID, ProductName and UnitPrice columns. Click Next.

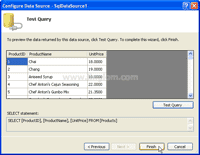
- On Test Query, you can click on Test Query button to verify the query result. Then, click Finish.

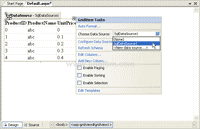
- Drag a GridView object from Toolbox to the Web Form. Then, choose the Data Source to the one that you have just created.

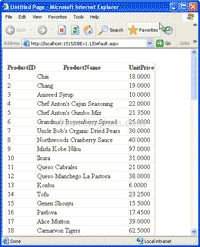
- Build and run the project. You will see the result as the figure below.
