How to compile VTK for Java using Microsoft Visual Studio .NET 2003
Currently, I’m doing a Java Project that need some 3D image processing so I come across with VTK which is an open source consists of a C++ class library, and several interpreted interface layers including Tcl/Tk, Java, and Python. To use VTK in Java, I need to compile VTK for using with Java. I have found only a few website that related with this topic and hardly to get troubleshoot problems so I decided to write the tutorial.
What do you need?
- VTK Source and Data.
In the example, I used VTK Source 4.4.2 and Data 5.0.2. I’ve found that when compile Source 5.0.2 in VS .NET, I got some errors so I recommend as that I use. - CMake Cross Platform Make.
In the example, I used CMake 2.4.6 - Microsoft Visual Studio .NET 2003
Step-By-Step Guide
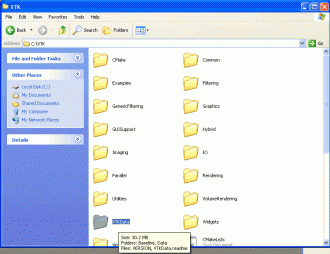
- Extract VTK Source and Data. I extract VTK Source to C:\VTK and VTK Data to C:\VTK\VTKData.
- Run CMake to make project for VS .NET 2003
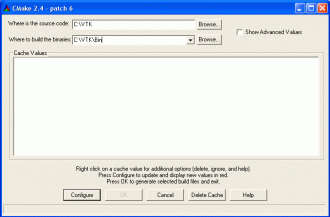
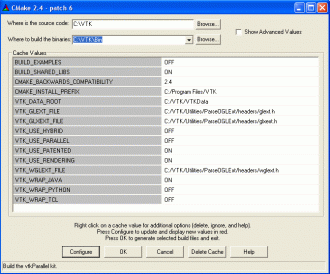
- Specify source code path as C:\VTK and build binaries to C:\VTK\Bin as figure below.
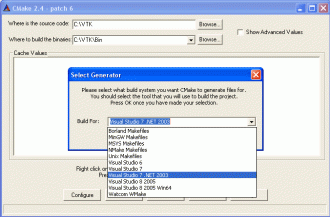
You can choose place to keep Binaries elsewhere if you want. - Click Configure. New Window appears to let you choose which compiler you want CMake to build for. Select Visual Studio 7 .NET 2003. Click OK.
- New Window appears to confirm new directory creation. Click OK. Wait few minutes.
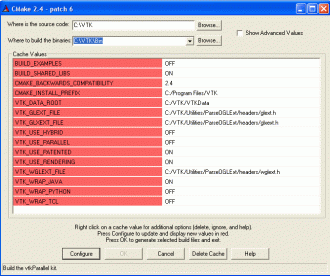
- When finished, there will be some attributes show in cache values in red. Change some attributes as figure below. Then Click Configure, again.
BUILD_SHARED_LIBS = ON.
VTK_DATA_ROOT = C:\VTK\VTKDAta (Where you extract VTKData).
VTK_WRAP_JAVA = ON (To make library for Java) - When configured done, the color on attributes will change to gray. Now Click OK.
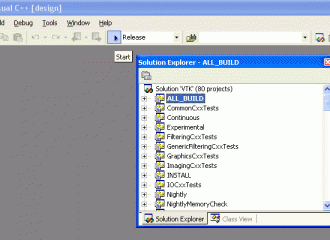
- When finished, CMake will close itself automatically. Now let see C:\VTK\Bin, where you build Binaries to, you will see solution file (VTK.sln). Double-click it to run Visual Studio.
- Change Solution Configuration to Release to make sure that the compiled libraries can be use on other machine.
- Then, Click Start (Debug -> Start) or press F5 to compile the project. This step may takes up to 1-2 hours depends on your CPU.
- There may be new window show about configurations are out of date, just ignore it by select Yes.
- The Compile will finish when the output window show as below.
- If there is a window as below, you can ignore it by Click Cancel.
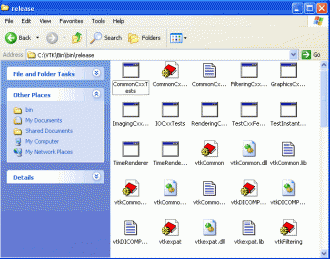
- Finish!. Now you get the compiled library files in C:\VTK\Bin\bin\release for DLL files and C:\VTK\Bin\java\vtk for Java Class files.
- For DLL libraries in Release folder, you can use by add System path to the folder. My Computer -> Properties -> Advanced -> Environment Variables -> Edit on Path in System Variables. Insert directory where DLL files are.

- For Java libraries in java\vtk\, you can use by compile them to .class file.




The process works for VS Express 2008 as well.
I did this under Vista x64 with the 32-bit J2SE successfully
Thanks for the clear instructions 🙂
VS2008 + Q9450 + 8GB RAM + Raptor = Fast Compile
Thank for sharing the information, Alex.
An image speaks more than one thousand words.
Thanks a lot.
thanx alot I will try it, wishing that will help me
I will ask u if I faced aproblems
I need a help , how can do that but for c# please, can I use the created DLL for c# .
I tried your steps but gave me errors while running on visual studion 2008 team edition
any help please
Hi, Ali
The article was based on Visual Studio 2003 only. I have tried on Visual Studio 2005 and it was error, too.
The article was two years ago, may be there is a solution now. Try to search on the Internet with your error messages.
sir i need vs 2003 can you give to me