- Accessing MySQL on VB.NET using MySQL Connector/Net, Part 1: Introduction
- Accessing MySQL on VB.NET using MySQL Connector/Net, Part 2: Setup MySQL Server
- Accessing MySQL on VB.NET using MySQL Connector/Net, Part 3: Install Sample Database
- Accessing MySQL on VB.NET using MySQL Connector/Net, Part 4: Create & Grant MySQL User Account
- Accessing MySQL on VB.NET using MySQL Connector/Net, Part 5: Install MySQL Connector Net
- Accessing MySQL on VB.NET using MySQL Connector/Net, Part 6: Create Connection
- Accessing MySQL on VB.NET using MySQL Connector/Net, Part 7: Perform SQL Operations
- Accessing MySQL on VB.NET using MySQL Connector/Net, Part 8: Display Result on GUI
In this post, I’ll show how to setup MySQL Server on a database PC.
Step-by-step to setup MySQL Server
- Download MySQL 5.1.30 Community Edition from mysql.com.

- Double-click the setup file mysql-essential-5.1.30-win32.msi. Click Next.

- On Setup Type, select Typical. Click Next.

- On Ready to Install the Program, click Install.

- On Wizard Completed, check Configure the MySQL Server Now and click Finish.

- On MySQL Configuration Wizard, click Next.

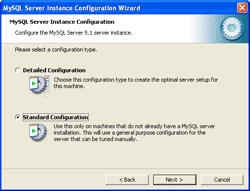
- On MySQL Server Instance Configuration, select Standard Configuration.
Note: If you want to develop in a single PC environment, you can select Detailed Configuration instead and choose Developer Machine so MySQL Server won’t consume too much resource on the PC.
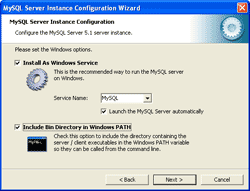
- On MySQL Server Instance Configuration, verify that all check boxes are checked on this page and click Next. The first and second (Install As Windows Service and Launch the MySQL Server automatically) check boxes configure MySQL as a Windows service so that you don’t have to login to the PC and start MySQL Server manually, it’ll start when the PC is on automatically.
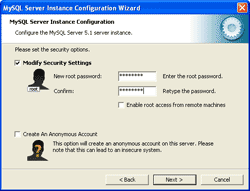
- On MySQL Server Instance Configuration, check only the upper check box Modify Security Settings and enter the root password. The root user is the default user on MySQL who has all privileges on the MySQL Server. In this example, I set the root’s password to “password”. Click Next.
Note: This is just an example, you should set password more complexity than this.
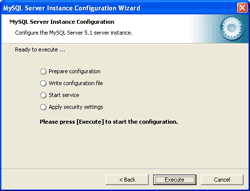
- On MySQL Server Instance Configuration, click Execute to start the configuration.
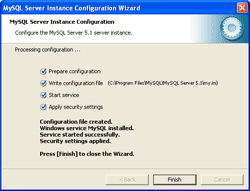
- When the configuration is done, click Finish to complete install and configure MySQL Server.
